Boring interview footage becomes a compelling brand story when you stop treating it as a recording and start treating it as raw material for a movie trailer. The transformation happens in the edit: open on the viewer's pain (not the interviewee's name), sequence soundbites into a Storybrand-shaped arc, and cut music, pacing, and impact moments so the energy of the track rises and falls in lockstep with the story. Everything else is decoration.
Here is the exact sequence we use at Full Send to rescue flat interviews, including one we reedited from another agency's footage and turned into the client's most impactful piece.
Step 1: Log the footage for pain, not for polish
Watch the raw interviews once through with a single question in mind: where does the speaker name a real pain your viewer feels? Not the speaker's pain, the viewer's. Timestamp those moments first.
Most editors log for "good quotes" and end up with a highlight reel of polished corporate language. That is why the videos feel flat. The soundbites that carry a story are the ones where a customer says the quiet part out loud: "We were losing hours a week on this," "Our team was drowning in tickets," "I did not trust our own numbers." That is your gold.
Step 2: Open on the pain, in the first three seconds
This is where most sales and testimonial videos die. They open with the interviewee introducing themselves, their title, their company history, their passion for the industry. No one cares. Those first seconds decide whether anyone keeps watching.
Cut straight to a soundbite that names a pain your target viewer already feels. Then spell that pain out for another beat or two. Two things happen at once: the viewer is reminded of the problem they want to solve, and the viewer feels understood. Only then do you have permission to introduce the speaker or the brand.
Step 3: Position the brand as the guide, not the hero
After the pain lands, cut to a clear, short statement of who the brand is and who they help. One or two positioning phrases, no more. The customer is the hero of the story. The brand is the guide with a plan.
If you want the full framework this leans on, our strategy page walks through how we apply Donald Miller's Storybrand approach to video specifically.
Step 4: Sequence three proof points, not seven
When you have great interview footage, the temptation is to use all of it. Resist. If everything is exciting, nothing is exciting. If everything is loud, nothing is loud.
Pick three proof points from the interview that map to the three biggest pains you named at the top. Sequence them logically so each one builds on the last. Trim every soundbite to its shortest usable form. A twelve-second answer almost always contains a four-second version that hits harder.
Step 5: Edit the music like a movie trailer
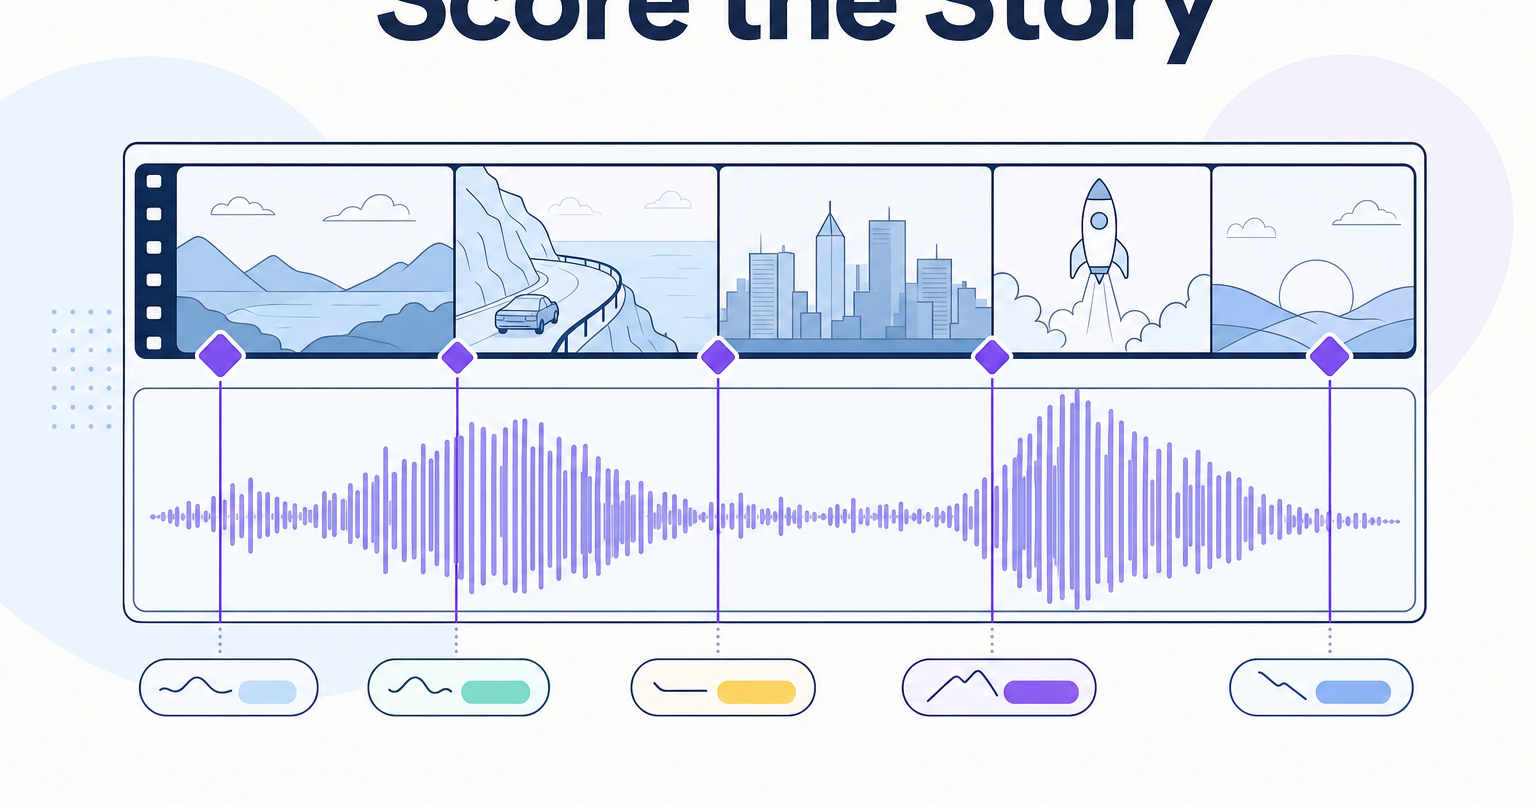
This is the step most in-house teams skip, and it is why their videos feel flat even when the story is right. Map the turns in your story on a timeline. Then rearrange the music: trim sections, extend others, move the drop, so the energy of the track rises and falls with the story turns. The song's peak should land on the story's peak. Not close. Exactly on it.
Step 6: Build "impact moments" for the sentences that matter most
When a soundbite carries the whole point of the video, punctuate it. Cut the music out under the line. Add a clean reverb tail on the cut. Use a riser to build tension into the drop. Then bring the music back in hard the instant the soundbite ends. Think of it as a strong period at the end of a powerful sentence. Used once or twice in a two-minute video, it is unforgettable. Used five times, it is noise.
Step 7: Close with a plan, not a plea
End with a specific next step the viewer can take, framed as the plan the guide is handing them. Not "learn more." Something concrete.
We do this for mission-driven tech companies every week, often with SaaS explainers built from customer interviews. If your interview footage is sitting on a hard drive waiting to become something, we would be glad to take a look.